Friday, December 25, 2009

Judith's Cioppino


This recipe is adapted from one by Judith Tirado, Michael Mina's mother-in-law that was published in Food and Wine 2005. We used half the amount of seafood from the original recipe, since we were serving 4 and we wanted to have lots of soup. (We still had plenty of leftovers). It was delicious served with toasty garlic bread to dunk in.

Ingredients

1/4 cup extra-virgin olive oil
8 large garlic cloves—6 finely chopped, 2 whole
2 jalapeños, seeded and minced
2 red bell peppers, finely chopped
1 large onion, finely chopped
1 large bay leaf
2 tablespoons tomato paste
1/2 cup dry red wine
One 28-ounce can peeled tomatoes, finely chopped, juices reserved
Four 8-ounce bottles clam broth
1 1/2 cups water
Salt and freshly ground pepper
1/2 cup packed basil leaves
1/2 teaspoon crushed red pepper
2 steamed Dungeness crabs, about 2 pounds each (see Note)
2 dozen littleneck clams, scrubbed
1 pound firm, white-fleshed fish fillets such as halibut, skinned and cut into 1 1/2-inch chunks
1 pound large shrimp, shelled and deveined
1/2 pound sea scallops, halved vertically if large
Crusty bread, for serving

Directions

  1. In a very large soup pot, heat 1/4 cup of the olive oil until shimmering. Add the chopped garlic, jalapeños, bell peppers, onion and bay leaf and cook, stirring occasionally, over moderately high heat until softened and beginning to brown, about 10 minutes. Add the tomato paste and cook, stirring, for 1 minute. Add the wine and cook until nearly evaporated, about 1 minute longer. Add the chopped tomatoes and their juices and cook over moderately high heat until slightly thickened, about 5 minutes. Add the clam broth and water, season lightly with salt and generously with pepper, and bring to a boil. Simmer over moderate heat until the broth is reduced to about 8 cups, about 20 minutes.
  2. The recipe calls for using a mini food processor for this, but we just hand chopped the basil and garlic and then pounded the rest with a mortar and pestle. Combine the basil leaves with the whole garlic and process until the garlic is finely chopped. Add 2-3 tablespoons olive oil and the crushed red pepper and process the basil puree until smooth. Season with salt and pepper.
  3. Working over the sink, pull off the flap on the undersides of the crabs. Remove the top shells and discard. Pry out the brownish insides and pull off the feathery lungs and discard. Rinse the crab bodies in cold water and quarter them so that each piece has body and leg.
  4. Add the crabs and clams to the pot. Cover and cook over high heat, stirring occasionally, until the clams begin to open, about 5 minutes. Using tongs, transfer the crabs to a large platter. Add the fish, shrimp, mussels and scallops to the pot, pushing them into the broth. Return the crabs to the pot, cover and cook, stirring occasionally, until the clams and mussels are fully open and the fish, shrimp and scallops are cooked through, about 8 minutes longer.
  5. Ladle the cioppino into deep bowls and drizzle each serving with some of the basil puree. Serve with crusty bread and pass the remaining basil puree separately.

Make Ahead

The Dungeness crab cioppino can be prepared through Step 1 and refrigerated for up to 3 days.

Friday, December 11, 2009

Roast Pumpkin with Cheese “Fondue”


From Gourmet Magazine, November 2008 (the above picture is also from same magazine)

Serves 4 (main course) or 12 (side dish)

Active time:25 min
Start to finish:2 hr

As the pumpkin roasts, its skin becomes gorgeously burnished, while inside, slices of baguette, Gruyère, and Emmental coalesce into a rich, velvety concoction that is utterly fabulous served with a scoop of tender pumpkin flesh.

Cooks’ note: Pumpkin can be filled 2 hours before baking and chilled. I added a minced clove of garlic along with a teaspoon of chopped fresh thyme. I also loosely covered the pumpkin for the first hour with a sheet of aluminum foil. The pumpkin was still very dark, some of the comments on Gourmet mentioned lowering the temp down to 350 and cooking for 90 minutes.


1 (15-inch) piece of baguette, cut into 1/2-inch slices (7 oz total)
1 (7-lb) orange pumpkin
1-1/2 cups heavy cream
1 cup reduced-sodium chicken or vegetable broth
1/2 teaspoon grated nutmeg
2 1/2 cups coarsely grated Gruyère (6 oz)
2 1/2 cups coarsely grated Emmental (6 oz)
1 tablespoon olive oil

Preheat oven to 450°F with rack in lower third.

Toast baguette slices in 1 layer on a baking sheet in oven until tops are crisp (bread will still be pale), about 7 minutes. Transfer to a rack to cool.

Remove top of pumpkin by cutting a circle (3 inches in diameter) around stem with a small sharp knife. Scrape out seeds and any loose fibers from inside pumpkin with a spoon (including top of pumpkin; reserve seeds for another use if desired). Season inside of pumpkin with 1/2 tsp salt.

Whisk together cream, broth, nutmeg, 1 tsp salt, and 1/2 tsp pepper in a bowl. Mix together cheeses in another bowl.

Put a layer of toasted bread in bottom of pumpkin, then cover with about 1 cup cheese and about 1/2 cup cream mixture. Continue layering bread, cheese, and cream mixture until pumpkin is filled to about 1/2 inch from top, using all of cream mixture. (You may have some bread and cheese left over.)


Cover pumpkin with top and put in an oiled small roasting pan. Brush outside of pumpkin all over with olive oil. Bake until pumpkin is tender and filling is puffed, 1 1/4 to 1 1/2 hours.


Monday, November 23, 2009

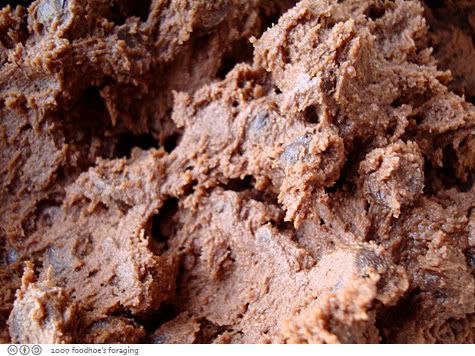
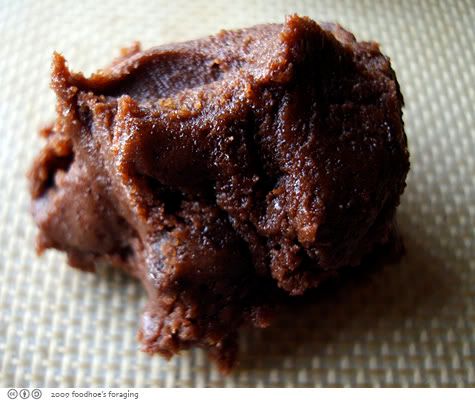
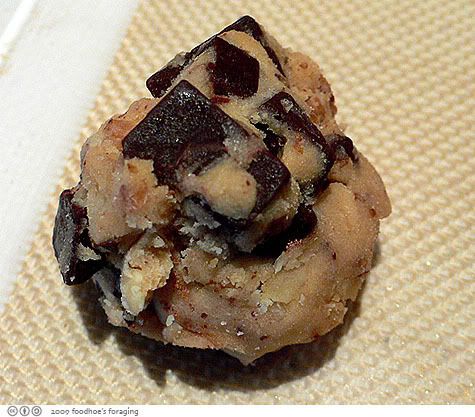
Chocolate Chocolate Chip Cookies


My cousins Sue and Judy visited from SoCal for the recent holidays and helped me make cookies for our Thanksgiving feast. We made the delicious chocolate chocolate chip cookies that I read about on Hungry Dog, that are based on a recipe from Ina Garten's Barefoot Contessa Parties
(thanks Samantha, these were delicious)!

2 stick (8 oz) unsalted butter, softened
1 cup light brown sugar, packed
1 cup granulated sugar
2 tsp vanilla extract
2 large eggs
2/3 cup unsweetened cocoa
2 cups all purpose flour
1 tsp baking soda
1/2 tsp kosher salt
3 cups chocolate chips

Preheat the oven to 350 degrees F.

Beat the butter and both sugars together until light and fluffy in the bowl of an electric mixer fitted with the paddle attachment. Add the vanilla, then the eggs, 1 at a time, and mix well. Add the cocoa and mix again. Sift together the flour, baking soda, and salt and add to the chocolate with the mixer on low speed until just combined. Stir in the chocolate chips.


Use two spoons, one to scoop up dough, and the other to scrape it onto a baking sheet lined with parchment paper or a silpat mat. I fit 12 cookies onto the sheet, leaving a few inches around each blob of dough. Dampen your hands and flatten the dough slightly.


Bake for exactly 15 minutes (the cookies will seem underdone). Remove from the oven and let cool slightly on the pan, then transfer to a wire rack to cool completely.


Yields about 48 cookies

Thursday, October 15, 2009

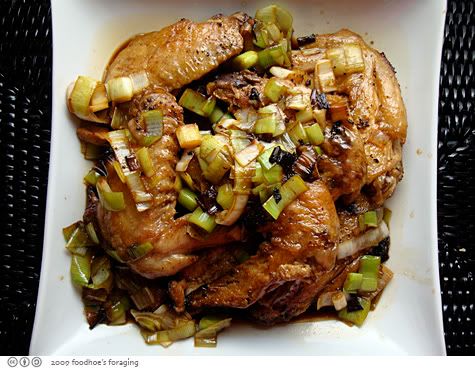
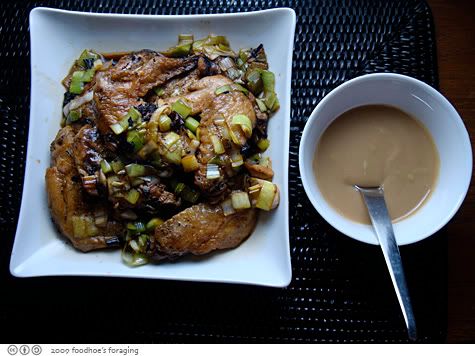
Tangy Seared Chicken Wings


Tori teba saki no su itame

I followed Elizabeth Andoh's recipe from her book Washoku: Recipes from the Japanese Home Kitchen, for the 4th challenge of the Washoku Warriors, which was cooking with vinegar.

Serves 4 to 6

12 chicken wings or 6 chicken thighs
2 Japanese leeks or small Western leeks, or 1 yellow onion (optional)
1 teaspoon canola or other mild vegetable oil if needed
3/4 cup basic sea stock or dashi
1/4 cup sake
1/4 cup rice vinegar
2 teaspoons sugar
3 tablespoons soy sauce.

Rinse chicken pieces under cold running water. Pat the pieces dry with paper towels.

Slice the white portion of the leeks lengthwise and then cut crosswise into 1/2 inch pieces. Rinse briefly under cold water to remove any grit and drain well. Or cut the onion into 8 to 12 wedges.

Choose a skillet or saute pan that will be wide enough to hold the chicken pieces in a single layer; it does not need to be deeper than 1-1/2 inches. If you want to make this dish as lean as possible, use a nonstick skillet. The amount of oil required, if any at all, to brown the chicken pieces will depend on the fat content of the poultry. Try searing the chicken without any oil to start. It is likely that its natural fat will melt and provide sufficient lubrication But if the chicken looks in danger of scorching, drizzle the oil into the pan in a spiral pattern, working from the outer edge toward the center.


Brown the chicken pieces well on one side, then flip them and brown the other side, too. after flipping them, add the leeks or onion and allow them to brown in the chicken fat or oil. When the browned leeks or onions become very aromatic, after about 1-1/2 minutes, remove them and set aside.

Add the stock, sake, vinegar and sugar and jiggle the pan lightly to make sure the sugar dissolves. Place the lid slightly askew, swirling the pan occasionally in circular motions to ensure even cooking. Lower the heat to maintain a steady, gentle simmer and cook for about 18 minutes for wings and about 25 minutes for thighs. Check the amount of liquid every 5 minutes or so. If it is reducing too rapidly, adjust the heat and add a few spoonfuls of water or stock.


When the chicken is fall-off-the-bone tender, add the soy sauce and cook for 1 minute. There should be 1/4 to 1/2 cup liquid remaining in the pan.

Remove the pan from the heat and allow the chicken to cool in the braising liquid. It is during this cooling down period that the flavors meld and enhance on another. If you will be serving this as picnic food, discard the leek or onions and serve the chicken at room temperature. If you want to enjoy this dish warm, reheat briefly just before serving. Arrange the chicken pieces on a platter or on individual plates. Return the leeks or onion to the skillet over high heat and cook until the liquid is reduced by half. Spoon this sauce over the chicken.

The author suggests plenty of paper napkins or moist travel tissues on hand. She even suggests that you may want to set out warm wet towels, what the Japanese call oshibori (literally "the wrung out cloth").

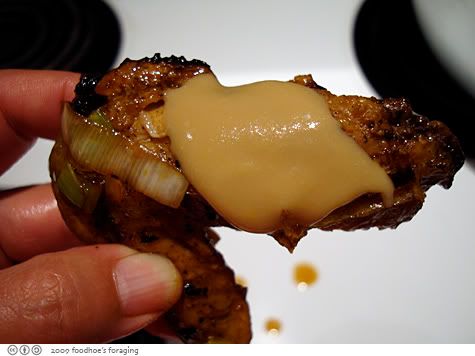
I served it with Tart Mustard Miso Sauce.


Tart Miso-Mustard Sauce


Karashi Su Miso


This is another recipe from Elizabeth Andoh's Washoku which can be made ahead and stored in the refrigerator for a few weeks. It is particularly good with cooked seafood and can be used as an alternative to tomato-based sauces with shrimp, lobster or crabmeat cocktail. You can also use it in place of mayonnaise when making sandwiches.

Makes 1/3 cup

2 tablespoons rice vinegar
1/4 teaspoon Japanese mustard (I didn't have Japanese mustard and used Colemans dry mustard)
3 tablespoons sweet, light miso, preferably Saikyo miso
a drop of light-colored soy sauce or salt, if needed
a drop of basic sea stock or water, if needed

In a small bowl, stir together the vinegar and mustard until smooth. Whisk in the miso until smooth and well blended.

Taste and adjust with the soy sauce if too sweet or with the stock if too thick. Transfer to a glass jar with a tight-fitting lid and store in the refrigerator for up to 4 weeks.

from Washoku, Elizabeth Andoh

Tuesday, August 11, 2009

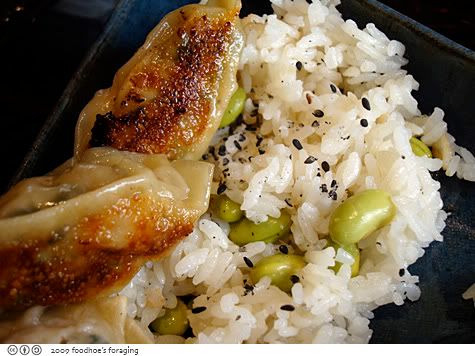
Rice Cooked with Edamame


recipe adapted from Elizabeth Andoh's Washoku: Recipes from the Japanese Home Kitchen

Makes 4 cups cooked rice

1/2 cup shelled edamame beans
2 cups basic sea stock or dashi
1 tablspoon mirin
2 teaspoons light-colored soy sauce
1 teaspoon soy sauce
1-3/4 cups japanese style white rice, washed
1 teaspoon black sesame salt*

Combine stock, mirin and soy sauce in a smal saucepan and bring the mixture to a simmer. Add the beans and cook for 2 or 3 minutes to ensure they fully absorb the flavors of the saeasoned stock. Drain the beans, reserving the cooking liquid. Set aside the beans, removing any looose skins.

To cook the rice in a rice cooker, place the rice in the bowl of the appliance. Add water if needed, to the cooking liquid to bring it up to 2 cups, and then add it to the rice coker. Make sure the liquid is cool before pressing the start button. The cooker's thermostat will malfunction with a hot or very warm liquid. As soon as the active cooking cycle switches off, scatter the simmered beans on top of the rice and re-cover the pot immediately. Allow the rice to self-steam for at least 10 minutes, or up to several hours if your cooker has a warmer feature.

Just before serving, use a rice paddle to stir the rice and beans with a light cutting and tossing motions to distribute the beans evenly. The bottom surface develops a slightly caramelized crust, or okoge, that is especially tasty.

Serve the rice hot or at room temperature, sprinkle each serving with seasoned salt.


To make black sesame salt:
combine
1/2 teaspoon coarse salt
2 teaspoons black sesame seeds, freshly dry-roasted.

Store in a tightly sealed glass jar for no more than a week.

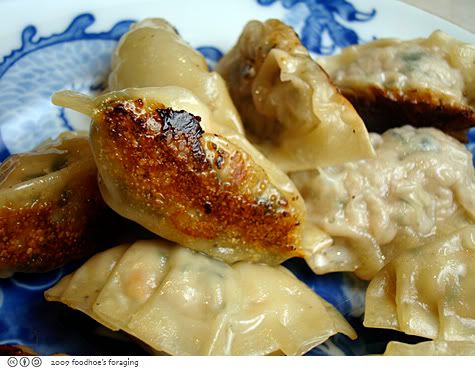
Wafu Gyoza, Pork and Wakame Dumplings


WASHOKU: Recipes from the Japanese Home Kitchen, Ten Speed Press 2005 (© 2005 All rights reserved by Elizabeth Andoh)

Makes 20 to 24 dumplings

filling:

  • 2-inch piece leek, about 1/2 ounce, chopped
  • 1 large leaf of cabbage, including thick stem portion, about 1/4 ounce, shredded
  • 1/4 cup dried wakame bits
  • 6 ounces ground pork
  • 1 tablespoon grated carrot
  • 1 tablespoon sake
  • 1 teaspoon dark miso
  • 2 teaspoons sesame oil (goma abura)

dipping sauce:

  • 2 to 3 tablespoons soy sauce
  • 1 to 2 tablespoons rice vinegar

Place the leek, cabbage and wakame in the bowl of a food processor and pulse-process until the mixture is finely minced. The dried wakame will pick up moisture from contact with the other vegetables and begin to soften.

Transfer the vegetable mixture to a deep bowl, and add the pork, sake, miso, and a drop or two of the sesame oil. Knead the mixture with your hands to ensure even distribution. Gather the meat mixture into a ball, lift and throw it back with force into the bowl, repeating this action 4 or 5 times, a bit like baseball practice. This pitching tenderizes the meat, and ensures the mass will hold together. Divide the meat mixture in quarters; then sub-divide each section 5 or 6 times (one small portion will become the filling for a single dumpling). Nearby, have a small dish of cold water ready, and a flat plate on which to line up the stuffed dumplings.

Lay a dumpling wrapper on a dry surface, and place one small portion of meat in the center of it.

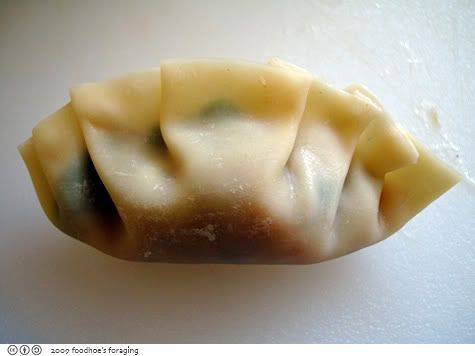
With fingertips moistened in water, trace a half-circle line near the edge of the wrapper. Fold the wrapper over to enclose the filling, and pinch in the center to seal the edges at that spot. Pleat the closer edge of the wrapper, to the right and left of the center, pressing it to the flat edge of the wrapper at back. Set aside the stuffed dumpling, plump meat-filled side down, pleated wrapper edge standing up. Repeat to make 20 or 24 dumplings in all.

In a skillet large enough to cook all the dumplings at once, heat a teaspoon of sesame oil over medium-high heat. Carefully line up the dumplings, side-by-side, in clusters of 5 or 6 each. Arrange them standing so that the pleats are at top and the plump, meat-filled portion is in contact with the skillet. Cook for 3 minutes, or until nicely browned. Check progress by lifting one or two dumplings by their pleated edge.

Pour in 1/4 cup of water, and when the hissing and splattering die down, drizzle in the remaining sesame oil around the inner edge of the skillet. At the same time, lower the heat to keep the liquid just at a simmer, and immediately place a lid on the skillet to trap in the moisture. This type of cooking is called mushi yaki, or "steam-searing," and ensures that the pork will be thoroughly cooked, yet moist, and succulent.

Check progress after 2 minutes. When the wrappers appear translucent and the meat is firm (check by pressing lightly with a spoon, or gently pinching with chopsticks), remove the lid, and raise the heat slightly. Continue to cook until all the water has evaporated and only the oil remains, about 2 minutes. Once you hear a sizzling sound, shake the skillet. The dumplings should slide about, most likely in clusters. If they seem to stick to the skillet, move the skillet away from the stove, and re-lid it for a moment.

Remove the dumplings, a cluster at a time, with a broad, flat, flexible spatula. Flip the dumplings so that the seared surface faces up. 5 or 6 dumplings make a single serving as an appetizer, though often twice that many will be served as a main course in a family-style meal.

Serve hot, with a dipping sauce made by stirring the soy sauce and rice vinegar together.

You can add a couple of minced cloves of garlic and some minced ginger to add some excitement to the dish, as well as chili oil to the dipping sauce if you like things spicy.

Sunday, July 12, 2009

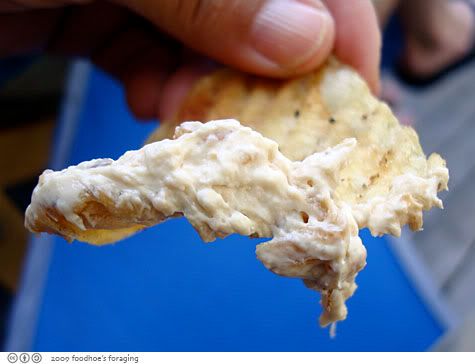
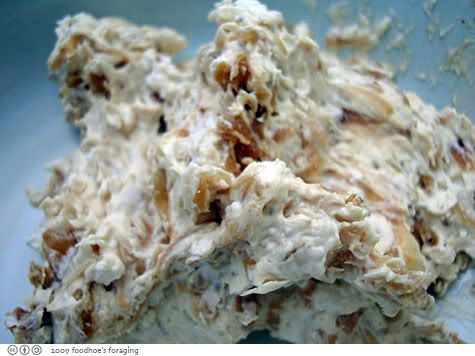
crispy shallot dip


a much better alternative to onion dip made from a packet.

2/3 c. olive oil
2 lbs. shallots, thinly sliced
2 sprigs fresh thyme, or 1/2 tsp. dried thyme
8 oz. cream cheese, softened
1 pint sour cream, room temp.
salt and freshly ground pepper
potato chips for serving


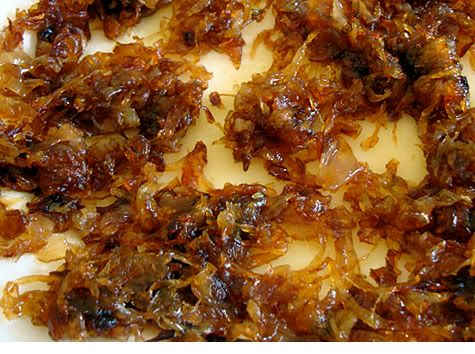
In a large skillet, warm the olive oil over moderately high heat. Add the shallots and stir in the thyme. Reduce heat to low and cook, stirring occasionally until the shallots are brown and crisp, about 30 minutes. Using a slotted spoon, transfer the shallots to paper towels to drain. Discard thyme sprigs if used.


In a medium bowl, mash together the cream cheese and sour cream with a wooden spoon. Stir in the shallots. Season with salt and pepper to taste. (the recipe can be made up to 1 day ahead; cover and refrigerate)


Food & Wine

Thursday, July 02, 2009

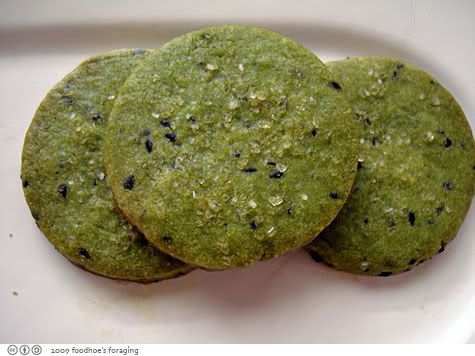
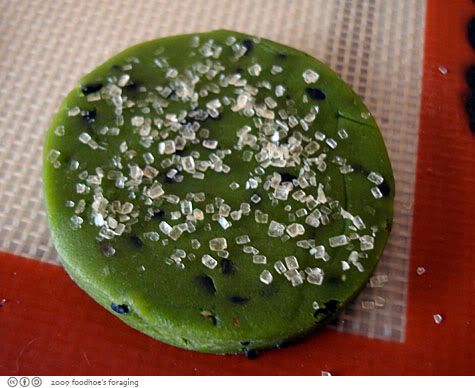
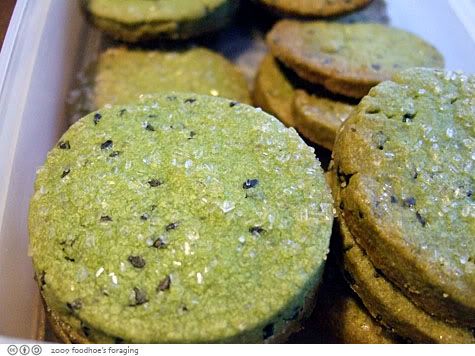
Matcha Sesame Shortbread Cookies


I was inspired by Foodgal's Ghoulish Green Cookies, which were chubby squares dusted with powdered sugar, but sounded so very interesting. I did a little online research and thought these cookies actually looked the best, but I wasn't about to make two different cookie doughs! I ended up adapting this recipe from the famous Lovescool blog.

Ingredients

Yield (2” round cookies): Approx 25
3/4 cup (2.25 oz) Confectioners sugar
5 oz Unsalted butter, cut into cubes
1- 3/4 cup (8.5 oz) All-purpose flour
3 Large egg yolks
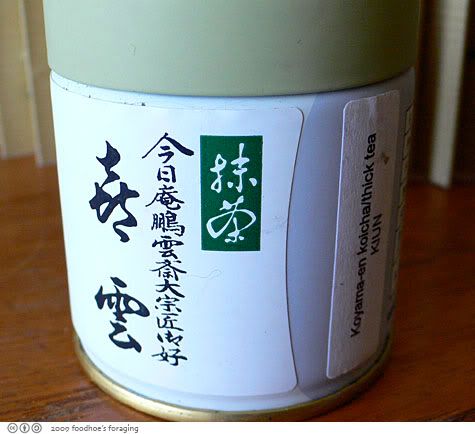
2 TBS Matcha (powdered green tea)
1/4 cup black sesame seeds
1 cup Granulated sugar (for coating) I used sugar in the raw

Directions

Preheat the oven to 350F. Line a sheet pan with parchment paper.
Whisk the confectioner’s sugar and green tea together in a bowl.
Add the butter and green tea/sugar mixture to the bowl of a stand mixer fitted with the paddle attachment. Mix until smooth and light in color.
Add the flour and mix until well combined.
Add the egg yolks and mix just until the eggs are fully incorporated and a mass forms.
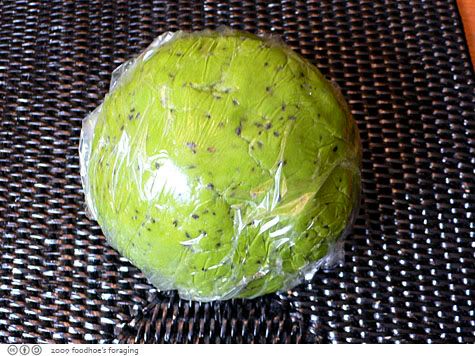
Form the dough into a disk and chill in the refrigerator until firm (about 30 minutes).


Roll the dough out to ½” thickness.
Cut the dough with a cookie cutter (you can use a juice glass if you want).
Toss each cut cookie in a bowl of granulated sugar to coat.


Place the sugar-coated cookie on a parchment lined pan. Bake at 350F for 12-15 minutes, or until slightly golden around the edges.


You can purchase Matcha (powdered green tea) from Asian grocery stores or specialty tea shops. Ito-En or you can order baking grade matcha online. The higher quality matcha you use, the brighter green the cookies will be. Store the cookies in a tin or other container that blocks out sunlight to preserve the color because the green color will fade. I used koichi that was so expensive that I was loathe to drink it and instead decided to enjoy it in these delicious cookies...


Friday, April 10, 2009

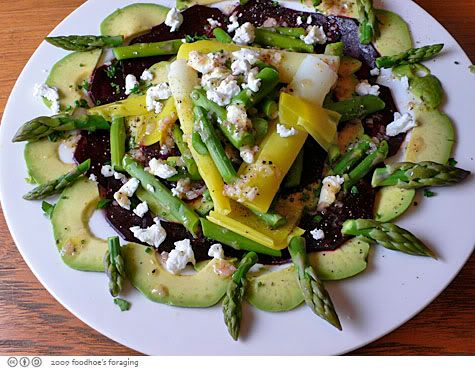
Salad of Leeks, Beets and Avocado

I found this delicious recipe to use all of these fine spring vegetables that have ripened to perfection in my pantry. It's from The Lutece Cookbook, co-authored by Chef Andre Soltner, who helmed the famed kitchen at Lutece for 30 years. He now is Dean of Classic Studies at the French Culinary Institute in New York and I was tickled to see him once as a stern guest judge on an episode of Top Chef.

SALAD OF LEEKS, BEETS AND AVOCADO

Serves 4

4 small red beets
4 medium leeks, the white part only
2 avocadoes, ripe
4 small shallots, peeled and chopped fine
1 teaspoon Dijon mustard
1-1/2 tablespoon vinegar (tarragon vinegar preferred)
generous pinch salt
pepper, freshly ground
2-1/2 tablespoons olive oil
1/2 tablespoon minced chervil (or Italian parsley)

1. Cook the beets, covered in boiling salted water until they are tender-about 45 minutes. Peel the beets, cut them in 1/8 inch slices, and set them aside at room temperature. Do not chill them

2. Split the leeks in half lengthwise, and wash them thoroughly. Tie them in a bundle, and cook them, uncovered, in boiling salted water until tender - about 15 to 20 minutes. Set the leeks aside at room temperature. Do not chill them.

3. Cut the avocados in half -- to the seed -- lengthwise. Twist the 2 halves in opposite directions to separate them. Remove and discard the seed. Peel off the skin, and cut the avocados in 1/8 inch slices. Arrange the slices decoratively on 4 plates with the beets and leeks.

4. In a mortar and pestle, smash the shallots. Add the mustard, vinegar, salt and pepper. Whisk these ingredients together and then, whisking constantly, slowly add the oil. Pour this vinaigrette over the vegetable. Sprinkle the salad with the chervil (or parsley). Serve at room temperature.

I added steamed asparagus and some bits of goat cheese I had in the fridge. Delicious with a crusty baguette and butter... Mr. K, who has long been a beet-hater, actually liked this salad. Despite initial fear and trepidation he said he finally has had a moment when he didn't hate beets.


Tuesday, February 17, 2009

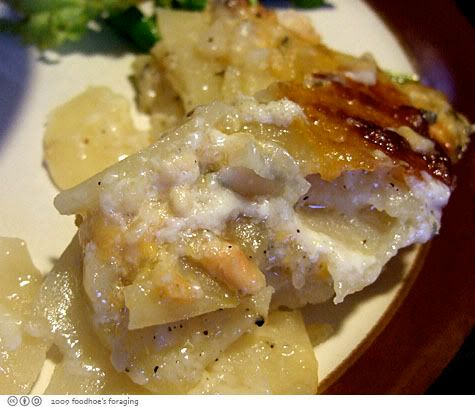
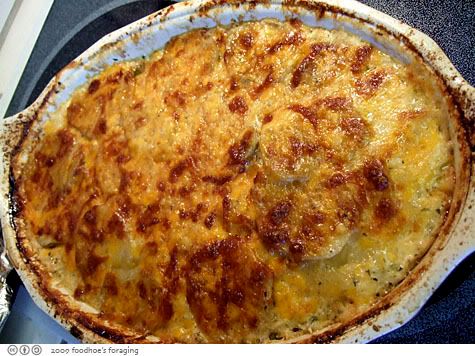
Scalloped Potatoes with Three Cheeses


Bon Appétit | November 1999 | by Rick Rodgers

Yield: Makes 12 servings

Total time can take up to 2 hours (includes 2 rounds of baking for 45 minutes)

This is so good and much easier to cut all those potatoes if you have a mandoline...

3/4 cup (packed) grated extra-sharp cheddar cheese (about 4 ounces)
3/4 cup crumbled Danish blue cheese (about 4 ounces)
1/3 cup (packed) freshly grated Parmesan (about 1 1/4 ounces)

4 russet potatoes, peeled, cut into 1/4-inch-thick rounds
1 1/2 teaspoons salt
1/2 teaspoon ground black pepper
1/4 cup finely chopped onion
3 tablespoons all purpose flour
4 tablespoons (1/2 stick) butter

2-1/2 cups whole milk

Preheat oven to 400°F. Lightly butter 13x9x2-inch glass baking dish. Mix cheddar cheese, blue cheese and Parmesan in small bowl.

Arrange half of potatoes in prepared baking dish, overlapping slightly. Sprinkle with teaspoon salt and 1/4 teaspoon pepper. Sprinkle onion over, then flour. Dot with 2 tablespoons butter. Sprinkle half of cheese mixture over. Top with remaining potatoes, 3/4 teaspoon salt, 1/4 teaspoon pepper and 2 tablespoons butter. Reserve remaining cheese.

Bring milk to simmer in medium saucepan. Pour milk over potatoes (milk will not cover potatoes completely). Cover baking dish tightly with foil. Bake 45 minutes. Uncover dish (liquids in dish may look curdled); sprinkle potatoes with reserved cheese mixture. Bake uncovered until potatoes are tender and cheese is deep golden brown, about 45 minutes longer. (Can be prepared 2 hours ahead. Let stand at room temperature. Cover and rewarm in 375°F oven about 20 minutes.) Remove from oven; let stand 15 minutes before serving.

Sunday, February 08, 2009

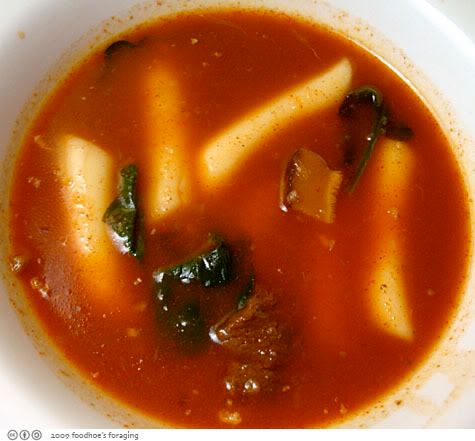
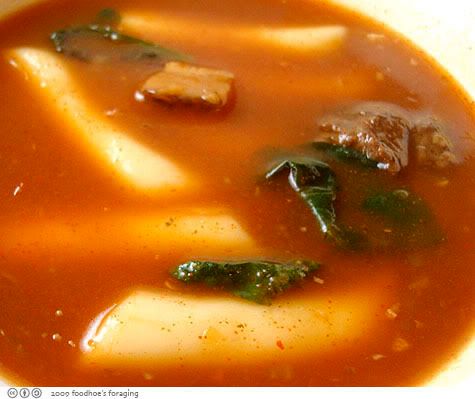
Hot and spicy rice cake (ddukbokkie)


I followed my favorite Korean cook, Maangchi's recipe but made a combination of her spicy and not so spicy versions, including some lean beef stew meat and substituting dried shiitake for fresh white mushrooms, since that was what I had.

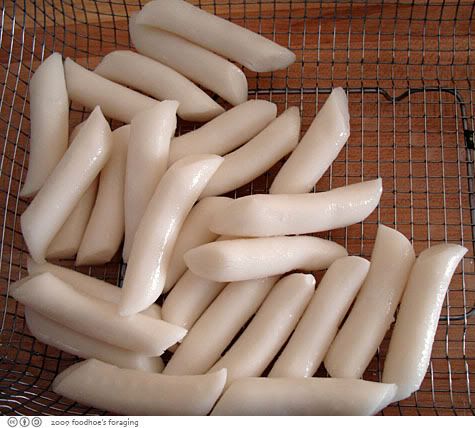
1 cup tube shaped rice cake for ddukbokkie
1/2 lb stew beef
2 tbs soy sauce
1 tbs sugar
2 cloves minced garlic
3 tbs of sliced onion
3-4 sliced white mushrooms or 3 dried shiitake - your preference
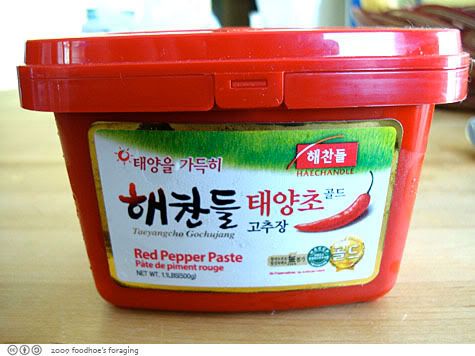
2-3 tablespoons red pepper paste (kochujang) or more, depending on your taste
1 tbs of hot pepper flakes (optional)
2 stalks green onion chopped into 2 inch lengths
4 cups water
dried anchovies

Directions:

Separate the tubes of rice cake into individual pieces, rinse.


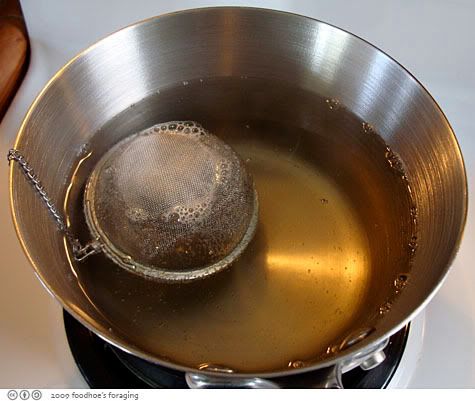
In a pan, pour 4 cups of water and add 7 large dried anchovies after removing their heads and intestines inside of a metal strainer and throw in the dried shiitake if you are using those. Boil the water for about 20 minutes over medium heat. After about 10 minutes, I pulled the shiitake out and cut them into smaller pieces and threw them back into the stock to fully reconstitute.


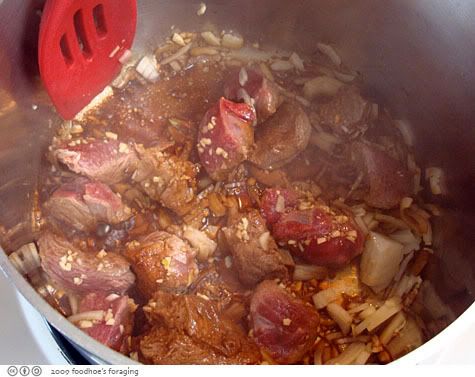
In a separate saucepan, saute stew beef with soy sauce, sugar, garlic, and sliced onion.


Remove the anchovies and add liquid to the saucepan with the beef. Simmer until meat is tender (this can take a while especially if you are using stew meat - it took over an hour, so I added water to the pot as it cooked down. Once your meat is ready, stir in the fresh mushrooms if you're using those, along with 2 green onions chopped to 2 inch lengths. Add the rice cakes, hot pepper paste and 1 tbs of hot pepper flakes (optional), stirring constantly.


Keep stirring until the sauce has thickened and the rice cake is shiny and softened. Transfer it to a plate and serve! It's delicious and I want to try making it with noodles and fishcakes as in this recipe at Peter's Home Cooking Diary next time!


p.s. I had some leftover and put it in a tupperware, which I don't recommend. The rice sticks had absorbed a lot of the liquid and were squishy and loose - very unappetising.

Sunday, January 25, 2009

Chocolate Chip Cookies


I found this recipe on Smitten Kitchen who proclaimed it to be their favorite chocolate chip cookie, adapted from David Lebovitz's, Great Book of Chocolate. Hmmm, I am a tollhouse cookie girl and don't know why I keep trying to find something better! This cookie has a high chocolate to cookie ratio, and the cookie is crisper.

I had just listened to food scientist Shirley Corriheron being intereviewed on the NPR radio program All Things Considered about her new book Bakewise: The Hows and Whys of Successful Baking. To prevent flat cookies, she suggests using an unbleached flour or a bread flour because they're higher in protein. More protein sucks in more water when they join together to make gluten, she says. She also suggests melting the the butter for the same reason, and that making cookie batter the night before is a good thing. The comments all mentioned flat cookies, so I decided to go with the bread flour, melted butter and then refrigerate the dough over night. I also used Scharffenberger semisweet chocolate chunks.

Makes 20 cookies

1/2 cup (100 grams) granulated sugar
1/2 cup (120 grams) firmly packed light brown sugar
8 tablespoons (1 stick) (115 grams) unsalted butter, cold, cut into 1/2-inch (1cm) pieces
1 large egg
1 teaspoon vanilla extract
1/2 teaspoon baking soda
1 1/4 cups (175 grams) all-purpose flour
1/2 teaspoon flaky sea salt
1 1/2 cups (200 grams) semisweet chocolate chips
1 cup (130 grams) walnuts or pecans, toasted and chopped

Adjust the oven rack to the top third of the oven and preheat to 300F (150C). Line three baking sheets with parchment paper.

Beat the sugars and butters together until smooth. Mix in the egg, vanilla, and baking soda.

Stir together the flour and salt, then mix them into the batter. Mix in the chocolate chips and nuts.

Scoop the cookie dough into 2-tablespoon (5cm) balls and place 8 balls, spaced 4 inches (10cm) apart, on each of the baking sheets. Since I had refrigerated the dough overnight, the dough was very stiff and firm.

Bake for 18 minutes, or until pale golden brown. Remove from the oven and cool on a wire rack.

Store at room temperature in an airtight container for up to 3 days.
My opinion? These were not better than Tollhouse cookies, which have the perfect flavor combination of butter, salt, cookie dough and chocolate. These were stiffer and tasted less buttery and maybe it was the fancy bittersweet chocolate chunks that were less sweet than the Nestle's chips... We ate them all though!


Wednesday, January 07, 2009

Short Ribs Stracotto


Recipe by Craig Stoll, Delfina Restaurant, San Francisco, CA who serves the short ribs over fresh fettuccine topped with gremolata that has been air dried to concentrate the flavors. It's even better the next day.

This is a beautiful winter dish that fills the house with delicious savory smells while it cooks. I ended up cooking it the day before and then putting it in the refrigerator overnight so that I could skim the fat off easier (there was quite a bit of fat). For the asian in me, it's better with plain white rice!

Serves 4 to 6
Start to finish time: 13 hours
Active cooking time: 4 to 5 hours

Stracotto
6 (2-bone) beef short ribs (chef stoll uses short ribs from the chuck, which are meatier than ribs from the plate)
3 cups dry red wine
5 allspice berries
2 or 3 whole cloves
kosher salt and freshly ground black pepper
2 tablespoons olive oil
1 yellow onion, chopped
2 carrots, peeled and chopped
2 stalks celery, chopped
4 cups beef stock
3 bay leaves
2 sprigs rosemary
2 sprigs sage

Gremolata minced zest of 1 lemon
1 clove garlic, minced
1 tablespoon minced fresh flat-leaf parsley

To make the stracotto, put the short ribs, wine, allspice, and cloves in a shallow baking dish. cover with plastic wrap and refrigerate for at leats 8 hours or up to 24 hours.

Preheat the oven to 325 f.

Remove the short ribs from the wine, reserving the wine, and pat dry with a paper towel. Librally season the ribs on all sides with salt and pepper. Heat the olive oil in a large, high-sided, ovenproof saute pan with a lid over medium high heat. Add the ribs and cook, turning as needed, for about 3 minutes per side, or until browned on all sides. Transfer the short ribs to a plate.

Add the onion, carrots, and celery to the pan and cook, stirring occasionally, for 3 to 4 minutes, until soft. Strain the wine through a fine-mesh sieve into the pan. Bring to a boil and cook for about 5 minutes, or until reduced by one-third. Add the stock, bring to a boil and add the ribs. Add the bay leaves, rosemary, and safe, cover, and bake for about 3hours, or until the meat is so tender it falls off the bone. Let cool.

To prepare the gremolata, place a piece of parchment paper on a flat surface. spread the lemon zest, garlic, and parsley out on the parchment paper and let dry while the ribs cool.

Tip the pan to skim away the fat on top of the vegetables, (as an alternative, you can refrigerate the short ribs and vegetables overnight or long enough for the fat to solidify and then remove it). Transfer the short ribs to a saucepan large enough to hold the ribs in a single layer.

Press the vegetables through a food mill with a small holed disk held over a bowl, or puree in a ablender and press through a large0mesh sieve into a bowl. Season to taste with salt and pepper and pour over the ribs. cook over low heat until the ribs are hot, about 30 minutes.

Divide the short ribs among warmed serving dishes. Spoon the sauce over the ribs. Combine the gremolata ingredients in a small bowl and sprinkle over the ribs Serve.

Friday, January 02, 2009

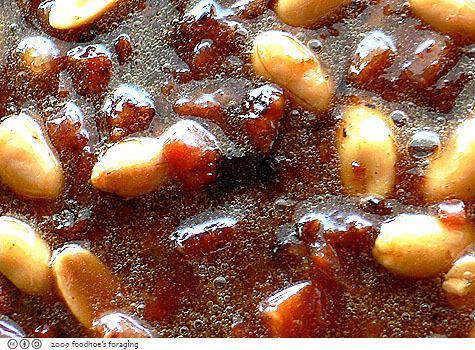
Bacon Peanut Brittle


I found this recipe by Brian Ries online at Creative Loafing's site.

1/2 cup brown sugar
1/2 cup sugar
1/2 cup light corn syrup
1/2 cup water
1 tablespoon reserved bacon fat
2 teaspoons vanilla extract
1 teaspoon baking soda
1/2 tsp salt
3/4 cup cocktail peanuts
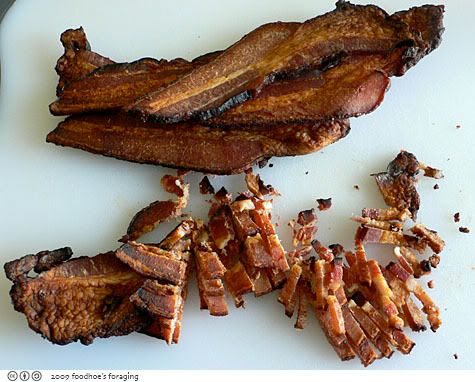
1 pound bacon (I used a package of thick cut applewood smoked bacon and cooked in the oven using the technique below)

1. Liberally grease a large baking sheet, or cover a baking sheet with greased parchment paper, or use a silicone mat (like a silpat).

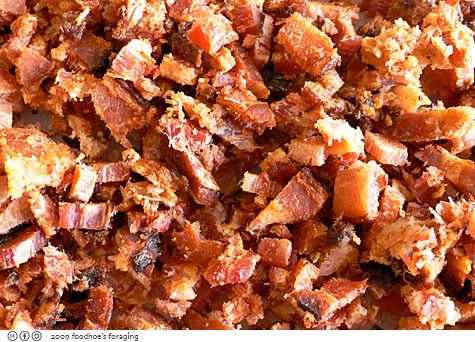
2. Fry the bacon. You want it crisp, but not too crisp. Chop or tear the bacon into 1/4 to 1/2 inch bits.


3. In a medium saucepan, combine both sugars, the corn syrup and water over medium heat. Stir until the sugar dissolves and the syrup comes to a boil. Attach a candy thermometer to the pan, increase the heat to medium high, and cook, without stirring, until the mixture reaches 290 degrees. Immediately turn off the heat.
(Try not to mess with the sugar while it is boiling, in order to avoid crystallization. Corn syrup is much maligned, but it’s a classic tool that helps avoid that crystallization. I tried versions with all white sugar and all brown sugar, but found that a mixture of both combined deeper flavor with that glowing translucence that makes brittle so pretty.)

4. Stir in the bacon fat, vanilla, baking soda and salt and quickly stir to distribute. Then, quickly add peanuts and bacon bits and mix to coat. Immediately pour the hot mixture onto a prepared baking sheet. Use a silicone spoon or spatula to spread mixture as thinly as possible.
(There is so much stuff in the brittle, it will start to seize and thicken quickly. That – and the mass of bacon and peanuts – prevents the brittle from becoming nice and thin. If you want that style, cut the amount of peanuts and bacon you add and leave the heat on when you stir in all the ingredients. This should make for a lighter style of brittle.)

5. Cool 10-20 minutes until hard, before breaking into pieces. Store in a covered container.

Oven Fried Bacon

Adjust oven rack to middle position and heat oven to 400 degrees. Arrange bacon slices in a large jelly-roll pan or other shallow baking pan. Roast until fat begins to render, 5 to 6 minutes; rotate pan front-to-back. Continue roasting until is crisp and brown, 5 to 6 minutes longer for thin-sliced bacon, 8 to 10 minutes for thick-cut. Transfer with tongs to paper towel-lined plate, drain, and serve.