Saturday, January 09, 2010

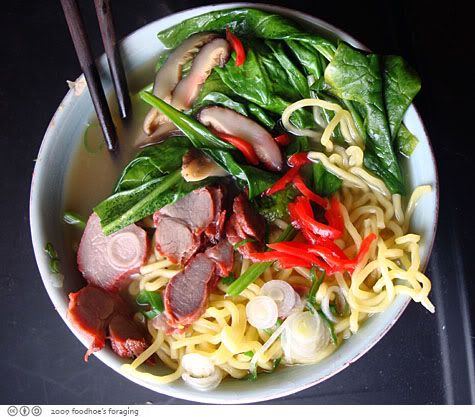
Momofuku Ramen Broth


from David Chang's Momofuku cookbook.

Makes 5 quarts


Two 3 by 6 inch pieces of Kombu
6 quarts water
2 cups dried shiitakes, rinsed
4 pounds chicken, either a whole bird or legs
5 pounds meaty pork bones
1 pound smoky bacon
1 bunch scallions
1 medium onion, cut in half
2 large carrots, peeled and roughly chopped

1. Rinse the konbu under running water, then combine it with the water in an 8 quart stockpot. Bring the water to a simmer over high heat and turn off the heat. Let steep for ten minutes.

2. Remove the kombu from the pot and add the shiitake mushrooms. Turn the heat back up to high and bring the water to a boil, then turn the heat down so the liquid simmers gently. Simmer for 30 minutes, until the mushrooms are plumped and rehydrated and have lent the broth their color and aroma.
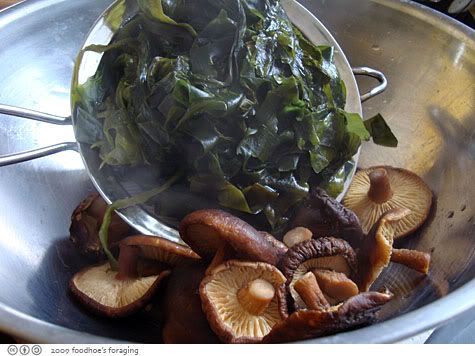
3. Heat the oven to 400F

4. Remove the mushrooms from the pot with a spider or slotted spoon. Add the chicken to the pot. Keep the liquid at a gentle simmer. Skim and discard any froth, foam or fat that rises to the surface of the broth with the chicken is simmering and replenish the water as necessary to keep the chicken covered. After about 1 hour, test the chicken; the meat should pull away from the bones easily. If it doesn’t, simmer until that’s the case and then remove the chicken from the pot with a spider or slotted spoon.
5. While the chicken is simmering, put the pork bones on a baking sheet or in a roasting pan and slide them into the oven to brown for an hour; turn them over after about 30 minutes to ensure even browning.
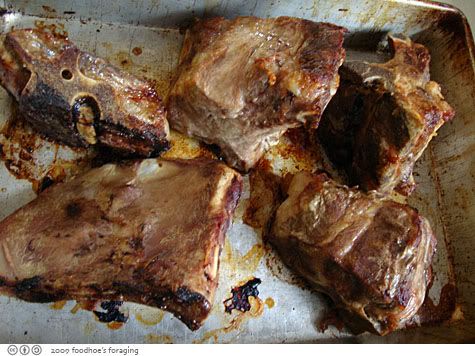
6. Remove the chicken from the pot and add the roasted bones to the broth, along with the bacon. Adjust the heat as necessary to keep the broth at a steady simmer; skim the scum and replenish the water as needed. After 45 minutes, fish out the bacon and discard it. Then gently simmer the pork bones for 6 or 7 hours—as much time as your schedule allows. Stop adding water to replenish the pot after hour 5 or so.
7. Add the scallions, onion and carrots to the pot and simmer for the final 45 minutes.
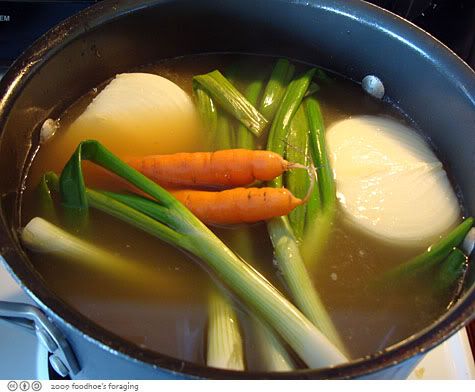

8. Remove and discard the spent bones and vegetables. Strain the broth. You can use the broth at this point or if you are making it in advance and want to save on storage space, you can do what we do: return it to the pot, and reduce it by half over high heat, then portion out the concentrated broth into containers. It keeps for a couple of days in the refrigerator and up to a few months in the freezer. When you want to use it, dilute it with an equal measure of water and reheat it on the stove.
9. Finish the broth by seasoning it to taste with salt, soy sauce and mirin. Only your taste buds can guide you as to the right amount of seasoning. Taste it and get it right. I like it so it's not quite too salty but almost. Very seasoned. Underseasoned broth is a crime.

Sunday, January 03, 2010

Fiery Parsnips (Kimpira)


from Elizabeth Andoh's cookbook, Washoku: Recipes from the Japanese Home Kitchen

I made this as part of my new years feast to celebrate 2010

Serves 4

2 or 3 parsnips, about 7 oz total weight
1/2 teaspoon sesame oil
1 teaspoon sake
1/2 teaspoon sugar
2 tablespoons soy sauce
pinch of shichimi togarashi
White Sesame seeds, freshly dry-roasted for garnish (optional)

To free the parsnips of dirt or other gritty material, scrub them with the rough side of a kitchen sponge or scrape them with the back of your knife. The peel, however, is is nutritious and tasty and should not be stripped away. Slice the parsnips into narrow julienne strips about 1-1/4 inches long. You should have about 1-1/2 cups strips. spread them out on a towel to dry.

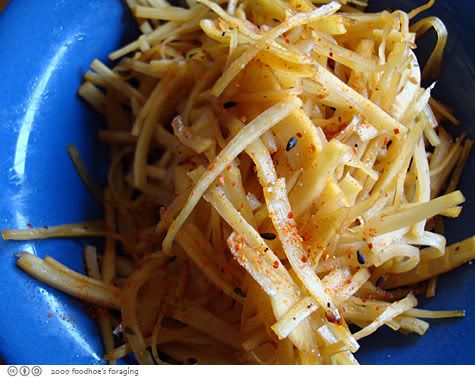
In a nonstick skillet, heat the sesame oil over high heat. Add the parsnips and stir-fry for 1 minute, stirring constantly. add the sake and stir fry for 1 minute. Add the sugar and cook, stirring occasionally, for 3 to 4 minutes more, or until the parsnips are lightly caramelized. Add the soy sauce and continue to cook and stir for 1 or 2 minutes, or until the liquid is nearly gone, and the parsnips are just tender and well glazed.

Sprinkle with shichimi togarashi and toss to distribute well. Remove the pan from the heat and let the parsnips cool to room temperature.

Mound in small bowls as individual portions, or serve in a single bowl, family style, and garnishw with the sesame seeds. If desired. Store leftovers in a glass jar in the refrigerator for up to 3 days.

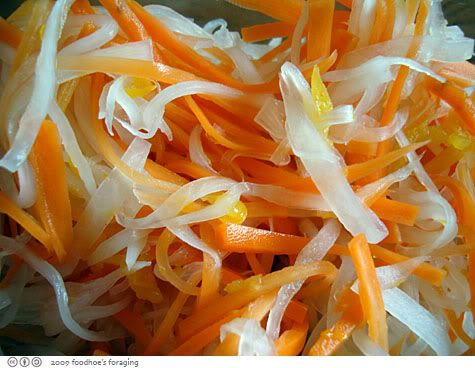
New Year's Salad


This salad of finely shredded daikon and carrot is accented with citrus and dried fruit and is dressed in a sweet and sour sauce. A red and white color scheme (the carrots are red, the radish is white) is often chosen for a celebratory menu in Japan. This particular dish typically graces holiday tables at the New Year and was part of my Washoku Warriors challenge for January 2010.

Serve 6 to 8

3.5 inch piece daikon, about 7 oz, peeled and cut into thin strips
1/2 teaspoon coarse salt
1-inch piece carrot, preferably Kyoto red carrot about 2 oz, peeled and cut into thin strips
1/2 tsp freeze-dried yuzu peel, ground to a powder, or finely grated fresh lemon zest
1/2 small dried persimmon or 1 small dried apricot, finely shredded
1/2 sweet and sour sauce, prepared with kombu piece

Place the daikon shreds in a bowl and sprinkle with 1/4 teaspoon of the salt. Allow the daikon shreds to sit undisturbed for about 2 minutes, or until they begin to sweat. Gently toss, gradually increasing pressure with your fingertips, squeezing and pressing to wilt the daikon. Pour off any accumulated liquid and rinse the wilted daikon shreds briefly under running cold water to remove excess salt. Squeeze again. The daikon will be pliable at this point.

Place the carrot shreds in a bowl with the remaining 1/4 teaspoon salt and let sit undisturbed for about 3 minutes, or until they begin to sweat. Gently toss, gradually increasing pressure with your fingertips, squeezing and pressing to wilt the carrot. Pour off the accumulated liquid and rinse the carrot shreds briefly under running cold water to remove excess salt. Squeeze again. The carrot will be pliable at this point.

Combine the carrots and radish in a bowl Add the yuzu peel and dried fruit and toss well to distribute Pour the sweet and sour sauce over the vegetable and fruit mixture and toss lightly. Let stand for at least 1 hour at room temperature. Or, for longer storage (up to 3 days), transfer the mixture with its sweet and sour pickling liquid to a glass jar. With clean chopsticks or another kitchen tool, press down on the mixture, making sure it is submerged in the liquid. Place the kombu piece on top before capping. Cover the jar with plastic wrap (to keep the vinegar from reacting with the metal of the lid) and a tight-fitting lid, or use a Mason jar.

Just before serving, drain the daikon and carrot mixture and discard the kombu. Gently squeeze out excess moisture.

Washoku Sweet and Sour Sauce (Amazu)

This mixture of vinegar and sugar balanced with a bit of salt is used to pickle both spicy and bland foods, helping to bring them into focus and harmony with accompanying dishes. It provides zip to mild lotus root, tames the fire of fresh ginger, and transforms sharp daikon into a pleasantly tangy side dish.

Makes 1/2 cup

1/2 cup rice vinegar
3 tablespoons sugar
1/4 teaspoon salt
1 piece kombu, 1 inch square

Combine the vinegar, sugar, salt and kombu in a small saucepan and let the kombu soak for at least 20 minutes or overnight; the soaking ensures that the natural glutamates of the kelp will mellow the sharpness of the vinegar and enhance the sweetness of the foods that will be pickled in the sauce.

Place the pan over low heat and stirring to dissolve the sugar and salt, slowly bring to just below a boil. Cook until the sugar and salt have completely dissolved, then remove from the heat and let the sauce cool in the pan before transferring it, including the kombu if you have used it, to a glass jar.

When the sauce is completely cool, cover the top of the jar with plastic wrap and then a tight-fitting lid. Store in the refrigerator for up to two months.

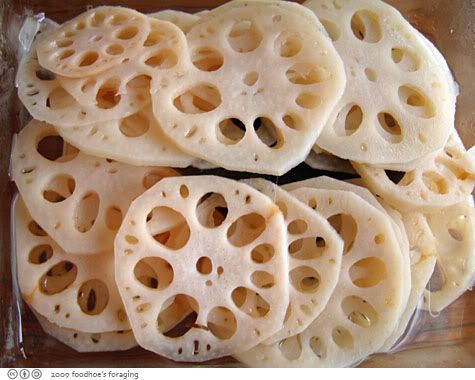
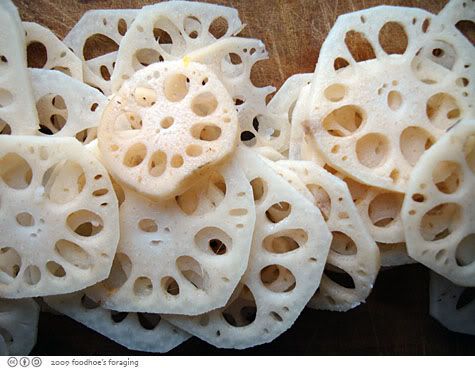
Sweet and Sour Lotus Root (Subasu)


Recipe from Washoku by Elizabeth Andoh that I made as part of my Washoku Warriors Challenge New Years feast for 2010

Whenever I see fresh lotus root at the market (especially small, slender, straight segments that enable me to make lots of attractive slices), I double, or even triple this recipe. Having subasu on hand in the refrigerator, I can easily dress up a salad, garnish a plate of broiled chicken or fish, or top a platter of scattered-style sushi.


Makes about 30 to 40 slices

2 cups cold water
2 tablespoons rice vinegar
1 small segment lotus root, about 4 oz, peeled, sliced as thinly as possible, and soaked
1/2 cup sweet and sour sauce, prepared with kombu piece

In a nonreactive saucepan, combine the water and vinegar and bring to a boil. Add the lotus root and blanch for less than a minute, or until barely tender and slightly translucent. Meanwhile, put the Sweet-and-Sour sauce in a glass jar.

Drain the lotus root slices well but do not refresh under cold running water. Transfer them immediately to the jar holding the sweet-and-sour sauce and arrange the kombu piece on top. With clean shopstick or another kitchen tool, press down to make sure that the lotus root is submerged in the pickling liquid. Let cool to room temperature.

When completely cool, cover the top of the jar with plastic wrap (to keep the vinegar from reacting with the metal of the lid) and a tight-fitting lid, or use a Mason jar. Allow the pickled lotus root to mature in the refrigerator for at least one day. It will keep for up to several months. Just before serving, discard the kombu piece, drain the slices, and blot them with paper towels.